Our BAAS framework in RAD Studio XE6 is based on our REST API framework. To enable push notifications on Android, we require Google Cloud Messaging (GCM) support to receive the push notifications. Parse does not currently support Google Cloud Messaging with their REST API, so if you are looking to use the same push notification service (BaaS) provider across both iOS and Android, I would recommend using Kinvey.
In this tutorial, I am going to show you how to setup and enable push notifications in your C++ and Delphi applications using XE6. The Delphi or C++ code is the same across iOS and Android, but the steps for setting up notifications are different on Android than on iOS, since you are connecting with Google Cloud Messaging (GCM) on Android and with Apple Push Notification (APN) on iOS.
In order to receive push notifications, you need to set up the messaging service (APS or GCM), the device, the cloud service (Kinvey), and your RAD Studio application. We have a great step-by-step tutorial on our docwiki that I recommend you look at since it walks you through all the steps.
My demo consists of a single form with a top aligned Toolbar and Label (to indicate the application name), and a client aligned ListView. The ListView will display each notification as a new item in the list. When the app is running in the background or is closed, you will see the notification displayed in the notification center on your device. On Android, you can access the notification center by swiping down from the top of your screen.
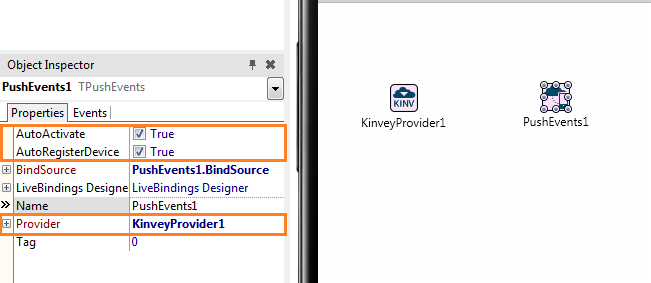
On my form, I placed 2 components:
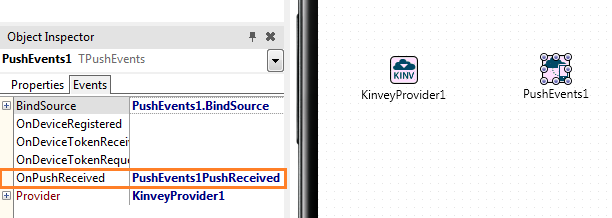
- TPushEvent, connected to my KinveyProvider component, with the following event setup:
void __fastcall TForm3::PushEvents1PushReceived(TObject *Sender, const TPushData *AData)
{
ListView1->Items->Add()->Text = AData->Message;
}
Delphi
procedure TForm1.PushEvents1PushReceived(Sender: TObject

  const AData: TPushData)

begin

    ListView1.Items.Add.Text = AData.Message;

end
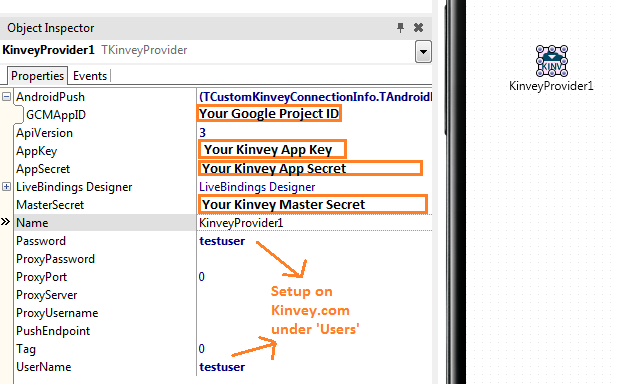
Next, you will need to setup the Messaging service. Please see this tutorial on how to register with Google and setup your push notification project. As part of that setup, you will be assigned a Project Number that you will need to enter on your Kinvey component, along with your Kinvey account info that you were provided when you signed up on Kinvey.com and setup the project.
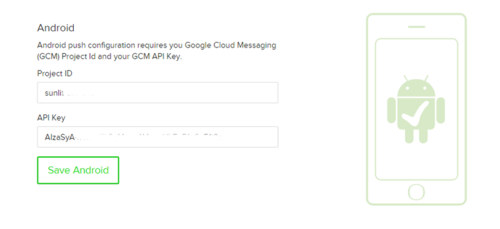
BaaS uses OpenSSL, but for Android, those files already exist on the file system, so you don't need to add or link in any ssl library files. To send push notifications, you will need to login to your Kinvey.com account, go to Addons > Messaging > Push and connect your Kinvey account to your Google Cloud Messaging account:
- Copy:
- the Project ID from your Google Cloud Messaging Setup
- the API Key from your Google Cloud Messaging Setup


