Have you ever written a component in Delphi? Reusable components are the corner-stone of rapid application development and important part of Delphi success on the market. Being able to manipulate an instance of a class at design-time is where Delphi shines!
One day I was looking at mocking up a FireMonkey turn-based board game. A screen with a board and names of two opponents. Next to every name – a turn indicator with a player score and ranking. In a typical design turn indicator is a triangle. In many cases if a triangle is solid-filled it indicates that it is a given player’s turn.
FireMonkey contains many components for 2D and 3D user interfaces. There are lines, rectangles, ellipsis, but no triangle. Wow! This looks like a great opportunity to build a simple, custom FireMonkey component and see what it takes.
In this post I’m going to describe step-by-step the process of creating a custom FireMonkey “TSimpleTriangle” component for displaying a triangle on a FireMonkey HD form.
Probably the best reference for building custom components in the actual source code of FireMonkey framework. That’s another great thing about Delphi! It has been always containing the actual source code of Delphi components that come out-of-the-box. Looking at components at the “Shapes” category it seems that the “TRectangle” component is the most similar to a triangle. Probably it is a matter of modifying some painting logic to draw a triangle and not a rectangle.

Let’s just quickly create a new Delphi “FireMonkey HD Application”, save all and drop a “TRectangle” on the form. If you click on “Save” again you will see the Delphi IDE has automatically added to the form’s “uses” clause “FMX.Objects” unit where “TRectangle” class is defined. Press “Ctrl” key and hold it. Hover the mouse over the “TRectangle” identifier and it should turn into a blue, underlined hyperlink. If you click on it, you will be sent directly to the declaration of the “TRectangle” class – line 81.

Let’s start from there! We probably do not need properties for radiuses, corners and sides, so our “TSimpleTriangle” should be even simpler!
Custom Delphi components live in packages. A “package” is a special type of a project that integrates with the IDE. It is a good programming practice to create two package projects for custom components. One package should be both “design-time” and “run-time” and contain the actual component source code. The second package should be “design-time” only and contain all the IDE registration code and possibly custom property and component editors. For demo purposes let’s keep things simple and just create one package for the “TSimpleTriangle” component code and “Register” procedure for installing the component into the “Shapes” category inside the IDE Tool Palette.
Start Delphi. Click on “File-New” menu and click on the “Package – Delphi” item. It is a good idea to keep package projects in a location with a relatively short path to make things simpler. I’m keeping all my custom components in a “C:\bdspath\” folder, but you can adopt a different convention. Save the project as “SimpleTriangle10”, but the actual name is not that important.
The next step is to provide the description to the package project and make sure that it is set as both “runtime” and “designtime”. This description will be visible in the list of installed packages inside the IDE, so let’s put there something descriptive like “FireMonkey Simple Triangle Component”.

Now we need to add to the project a Delphi unit for the implementation of the triangle class. “File”, “New” and “Delphi Unit”. Save the unit as “uSimpleTriangle” or something similar. Let’s add to it the declaration of the “TSimpleTriangle” class that is derived – like “TRectangle” class – from “TShape”.
We also need the registration code that would normally go into a separate “design time only” unit to install the component into the IDE. This is done through a global “Register” procedure (case sensitive!) that contains a call to “RegisterComponents” procedure defined in the “System.Classes” unit. At this stage our unit could look like this:
unit uSimpleTriangle;

interface

uses
  FMX.Objects;

type
  TSimpleTriangle = class(TShape)

  // TODO: implement "TSimpleTriangle" class

  endprocedure Registerimplementation

uses
  System.Classes;

procedure Registerbegin
  RegisterComponents('Shapes', [TSimpleTriangle]);
endend.
Let’s have a look at the implementation of the “TRectangle” class and adapt it to drawing a triangle and not a rectangle.
“TShape” class derives from “TControl” and indirectly from “TFmxObject”, which is the base class for all FireMonkey classes and derives from “TComponent”.

Our “TSimpleTriangle” class has all the functionality of the “TShape” and only needs the code to paint a triangle. Back in the VCL days I have implemented a triangle component with “Orientation” enumerated property being either “North”, “East”, “South” or “West”. In FireMonkey we have vector-based graphics and “RotationAngle” property inherited from “TControl” class, so we do not need to worry about the orientation of a triangle.
“TRectangle” class contains “Fill”, “Stroke”, “StrokeCap”, “StrokeDash”, “StrokeJoin” and “StrokeThickness” properties redeclared in “published” section to make them available at design time in the Object Inspector. We also need to add them to the declaration of our class.
We also need to override the “Paint” method inherited from the “TControl” class where we are going to paint the triangle on the form. After having a look at the implementation of the “TRectangle.Paint” method we can deduce that we should call drawing routines on the “Canvas” property.
The painting methods available at the “TCanvas” class is what we can use to draw a triangle. These are the available drawing routines defined in the “FMX.Types.TCanvas” class:
  TCanvas = class(TInterfacedPersistent, IFreeNotification)

  // ...

  public
    { drawing }
    procedure DrawLine(const APt1, APt2: TPointF; const AOpacity: Single); virtualabstractprocedure FillRect(const ARect: TRectF; const XRadius, YRadius: Single; const ACorners: TCorners;
      const AOpacity: Single; const ACornerType: TCornerType = TCornerType.ctRound); virtualabstractprocedure DrawRect(const ARect: TRectF; const XRadius, YRadius: Single; const ACorners: TCorners;
      const AOpacity: Single; const ACornerType: TCornerType = TCornerType.ctRound); virtualabstractprocedure FillEllipse(const ARect: TRectF; const AOpacity: Single); virtualabstractprocedure DrawEllipse(const ARect: TRectF; const AOpacity: Single); virtualabstractprocedure FillArc(const Center, Radius: TPointF; StartAngle, SweepAngle: Single; const AOpacity: Single);
    procedure DrawArc(const Center, Radius: TPointF; StartAngle, SweepAngle: Single; const AOpacity: Single);
    function PtInPath(const APoint: TPointF; const APath: TPathData): Boolean; virtualabstractprocedure FillPath(const APath: TPathData; const AOpacity: Single); virtualabstractprocedure DrawPath(const APath: TPathData; const AOpacity: Single); virtualabstractprocedure DrawBitmap(const ABitmap: TBitmap; const SrcRect, DstRect: TRectF; const AOpacity: Single;
      const HighSpeed: Boolean = False); virtualabstractprocedure DrawThumbnail(const ABitmap: TBitmap; const Width, Height: Single); virtualabstract{ routines }
    procedure DrawRectSides(const ARect: TRectF; const XRadius, YRadius: Single; const ACorners: TCorners;
      const AOpacity: Single; const ASides: TSides; const ACornerType: TCornerType = TCornerType.ctRound);
    { linear polygon }
    procedure FillPolygon(const Points: TPolygon; const AOpacity: Single); virtualprocedure DrawPolygon(const Points: TPolygon; const AOpacity: Single); virtual// other members stripped out for readability
  end
Notice that all these methods are declared as “virtual abstract”, which means that they have to be overridden in descendant classes. The “TCanvas” type is defined in “FMX.Objects” unit and is the key to cross-platform FireMonkey code. There are different implementations of “TCanvas” class depending on the underlying platform. Different for Windows, different for OSX and different for iOS. On Windows drawing is implemented with Direct2D or GDI+, on OSX with OpenGL and on iOS with OpenGL ES. Check out FireMonkey source files in “FMX.Canvas.*” units if you are into the implementation details.
It looks like “DrawPolygon” and “FillPolygon” are the best ones for drawing a triangle, because I would also like to be able fill the interior of my triangle. Both these methods accepts “Points: TPolygon” parameter and the opacity value. “TPolygon” type is defined in “System.Types” unit as a dynamic array of “TPointF”.
type
  TPointF = record
    X: Single;
    Y: Single;
  // ...
  endarray of TPointF;
It would not be efficient to allocate a new “Points” dynamic array in every call to “Paint”, so I’m going to define “FPoints: TPolygon” private field in my class that will be allocated in the constructor and freed in the destructor.
In a hypothetic “TTriangle” implementation we could let the end user to interactively set values for different points, but I’m going to keep it simple, so is the “TSimpleTriangle”. In the “TRectangle.Paint” method the first line of code is the call to “GetShapeRect” method defined in the “TShape” class that returns “TRectF” record with the coordinates of the bounding rectangle of the shape. I’m going to use this information to calculate points for drawing the rectangle.

Below is the complete source code of the “uSimpleTriangle” unit.
unit uSimpleTriangle;

interface

uses
  System.Classes, System.Types, FMX.Objects;

type
  TSimpleTriangle = class(TShape)
  private
    FPoints: TPolygon;
  protected
    procedure Paint; overridepublic
    constructor Create(AOwner: TComponent); overridedestructor Destroy; overridepublished
    property Fill;
    property Stroke;
    property StrokeCap;
    property StrokeDash;
    property StrokeJoin;
    property StrokeThickness;
  endprocedure Registerimplementation

procedure Registerbegin
  RegisterComponents('Shapes', [TSimpleTriangle]);
end{ TSimpleTriangle }

constructor TSimpleTriangle.Create(AOwner: TComponent);
begin
  inheritedenddestructor TSimpleTriangle.Destroy;
begin
  Finalize(FPoints);
  inheritedendprocedure TSimpleTriangle.Paint;
var
  R: TRectF; half: Single;
begin
  R := GetShapeRect;

  half := R.Left + (R.Right-R.Left)/2;
  FPoints[0] := PointF(R.Left, R.Bottom);
  FPoints[1] := PointF(half, R.Top);
  FPoints[2] := PointF(R.Right, R.Bottom);
  FPoints[3] := PointF(R.Left, R.Bottom);

  Canvas.FillPolygon(FPoints, AbsoluteOpacity);
  Canvas.DrawPolygon(FPoints, AbsoluteOpacity);
endend.
Simple. Isn’t it?
Now the last step is to build and install the package inside of the IDE. We could optionally create a custom icon for the “TSimpleTriangle” component as documented here, but I’m going to skip this step to keep things simple.
Right-click on the name of the package in “Project Manager” and select “Build” from the context menu.
Right-click again and click on “Install” and you should get the message saying the package was installed and the component registered.

Select “File” and “Close All” to close the package project.
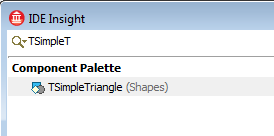
Now it is time to give the component a try! Create a new FireMonkey HD application project. Save all. Press “Ctrl” and “.” to bring up the “IDE Insight” and start typing “TSimpleTriangle” to narrow down the search and click on it.
Change the “RotationAngle” property to “90”, so it looks like a proper “game turn indicator”.
Drop a second one, and set its “RotationAngle” to “270”. You can also use “Brush” property to change the line and fill style.

Here we go! It turned out that it is pretty easy to create a simple custom FireMonkey graphical primitive!
In order to compile the test application you need to add the path where your package project is to “Library Path” in “Tools – Options” dialog in the “Delphi Options – Library”. In my case this is “c:\bdspath”.

Now you can compile the application as Windows 32-bit, 64-bit or OSX for running on Mac!

The full source code of “TSimpleTriangle” component can be downloaded from Code Central.
You can find more information about writing custom FireMonkey components in Delphi and C++Builder online at the docwiki site: