Delphi, C++Builder and RAD Studio include various VCL styles out of the box. These can be used for your Windows applications and customized via the included Bitmap Style Designer (Tools->Bitmap Style Designer). You can also create a new style from scratch. The easiest way to get started with a brand new style is to use the VCL style template in the Bitmap Style Designer as a guide. Below is a general outline of the steps required.
- a) File->'New style for VCL or FireMonkey' to start with a template
- b) File->Open to select an existing .vsf style (i.e. Carbon.vsf or Auric.vsf) for editing
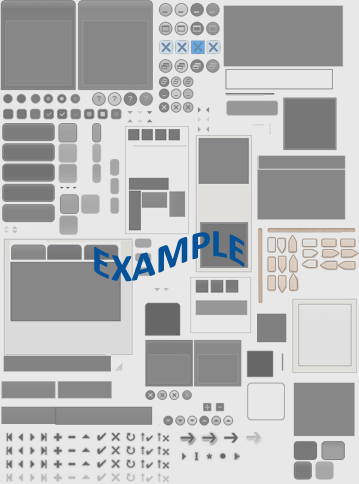
- Expand the Images node and click on 'style.png'
- Click 'Export' to export the png to a folder on your hard drive
- Open the png with the graphics program of your choice. In my case, I used Photoshop
- After you are done editing the style/creating a new style, select the style.png in the Style Designer, click update and select the updated png to replace the existing png
- Select each style element, and create a selection outline for each bitmap associated with a specific Bitmap property (hot, pressed etc.) in the Inspector
- Save the vsf style and apply it to your VCL application

In my case, I wanted to customize the CharcoalDarkSlate.vsf VCL style that can be found in C:\Users\Public\Documents\RAD Studio\12.0\Styles
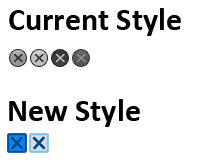
I opened the png in Photoshop. You can design several states for each graphic via the Bitmap property in the Inspector, i.e. Bitmap, BitmapHot, BitmapPressed, BitmapFocused etc.. In my example, I decided to change the style of the system close button from a dark circle to a blue square.
After creating the new shapes in Photoshop, I pasted them into the style.png. You can just place them over the existing circular buttons and cover them, or remove those from the graphic beforehand. We are going to select an outline for each button later on, so either approach works. Key is to keep the transparency of the style.png file.

I also update the style of the trackbar to a brown/wooden theme.
After completing the style changes, I saved my new style.png file, went back to the style in the Style Designer and clicked on Update. I then browsed to the location of my new style, selected it and clicked OK.
To make sure the new close buttons are properly mapped, expand the Objects-Form node until you have the sysButtons-btnClose node selected:

In the Inspector, select the … next to Bitmap. The Bitmap Property Editor appears. This editor allows you to select the outline of your clickable button. Click to select the left top corner of the button via a simple mouse click. Then, to select the bottom right corner (to create the entire outline), control-click onto the bottom right of the square button. Repeat this process for each of the Bitmap options in the Object Inspector for the selected style element.

When you are done, click 'Save' and preview your style in the VCL Style Viewer by clicking F9 in the Bitmap Style Designer.

Below is an example of what the Trackbar styling looks like.

To be able to utilize this style in your VCL applications, place the .vsf file into C:\Users\Public\Documents\RAD Studio\12.0\Styles
As my final step, I created a new VCL application in the IDE and placed the Trackbar component onto my form. Via Project->Options->Application->Appearance, I selected my custom style from the list, and also made sure it was selected as the 'Default Style' in the drop-down menu and clicked OK to select the style.
In order to see the style, you will need to run your application since VCL styles are shown at runtime.

For additional information, please see http://docwiki.embarcadero.com/RADStudio/XE5/en/VCL_Styles_Overview
Regards,
Sarina