Welcome to the second blog post in the ‘Learning to program with C++Builder’ series – a set of five articles taking you from knowing nothing about C++ to writing a real-world, useful application. The first entry covered installing C++Builder Community. Now it’s time to start using it! Today, we’ll cover the tools you use, creating your first app, and basic debugging.
Understanding the IDE
C++Builder, the product, is what we call the IDE (Integrated Development Environment), which is the program you see when you start C++Builder. An IDE has three general areas or things that it helps you do:
- A code editor
- A compiler
- A debugger
The code editor – and because C++Builder is great for UI programming, the form designer fits into this area too – is where you write code, a text editor with special enhancements for programming. When you have a form (that is, a window you are designing), one tab of the code editor lets you edit the form.
The compiler is what converts the code into a program that Windows can run.
The debugger lets you run the program and see what it’s doing. You can pause it, look at various parts of it, run through your code step by step, and so forth, all to understand what your code is doing and find the cause of any unexpected behaviour – that is, bugs.
All three of these are integrated together and accompanied by a number of dockable tool windows, other tools, etc. You don’t even need to think of these are separate things, more as just different actions you do: “now I’m writing code”, “now I’m running my program”.
Projects
Typically, you want to use more than one single source code file to create your application. A project is how the IDE groups together multiple source code files into one app, and includes other information, things like which platform you’re compiling for, or ‘targeting’, such as Windows or Mac, if when you compile you add in extra information for the debugger so it can see more about your app’s internals, etc.
When you create a new project the IDE creates several files for you. Let's have a look at these files.
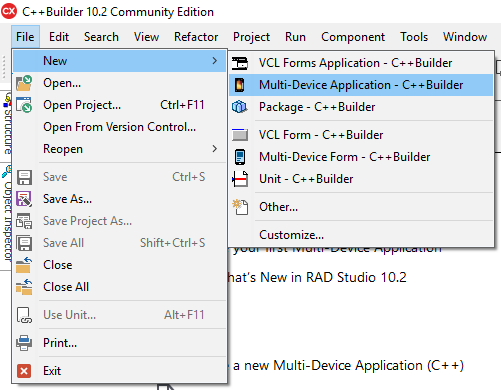
The first thing to do is create a new project. Start C++Builder, go to the File menu, and choose New > “Multi-Device Application – C++”. This create a new FireMonkey project, one that can be used on Windows, iOS, Android, etc. (You need to have these platforms installed if you want to build for them. Check this in the Tools menu, Manage Platforms.) In the dialog that appears, select “Blank application” and click OK.
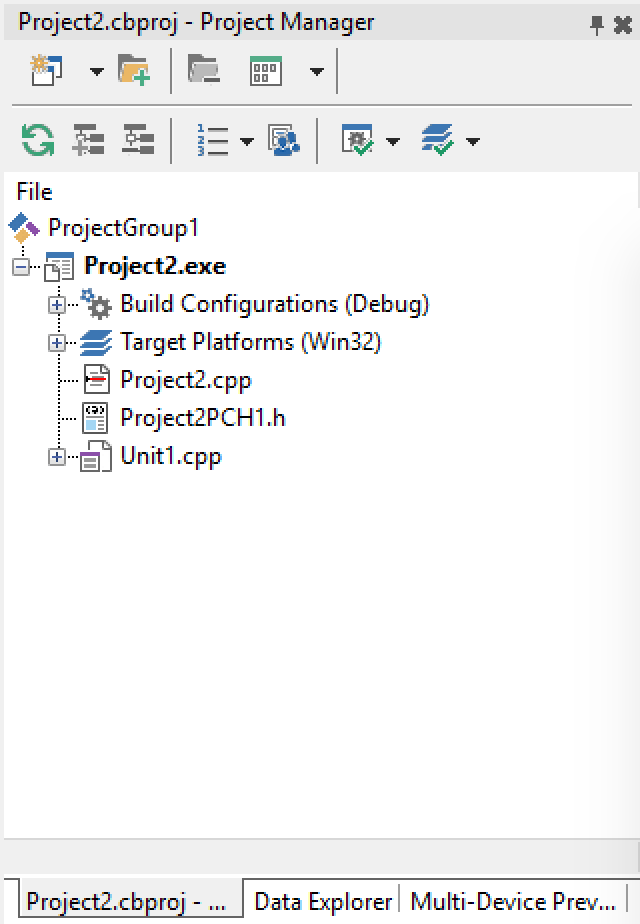
You now have a project, and you’ll see this in the Project Manager, a window that by default is docked on the right hand side of the IDE.
Before going any further, click the Save All button. You will be prompted to save several files. Put them all in the same folder. You’ll notice they are files listed in the Project Manager.
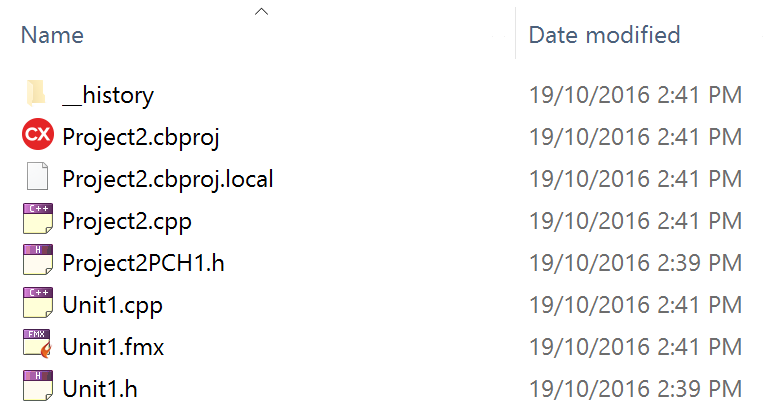
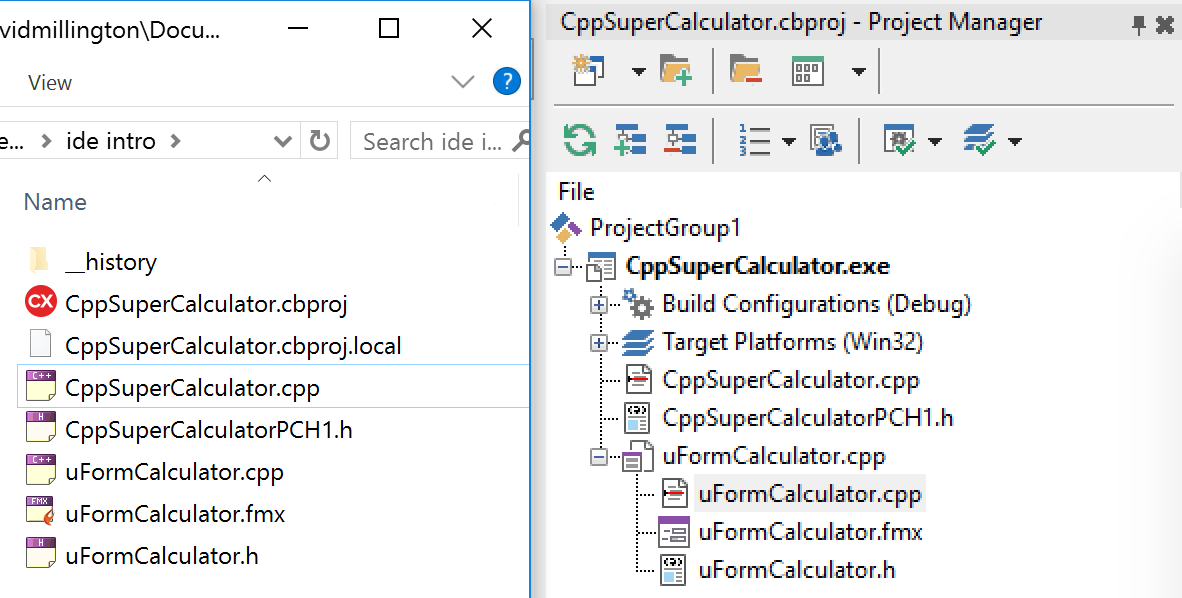
So what are these files? Open up the folder where you saved everything and have a look. For me, many of these are labeled ‘Project2’ – for you, they might have a different number. Most likely, yours will be Project1.
- Project*.cbproj (for me, Project2.cbproj.) This file describes the project – what files are in it, what the settings are. It corresponds to the bold top-level node labeled ‘Project2’ in the Project Manager.
- Project2.cpp: this is the first, main source code file for the application. Applications have an ‘entry point’, a place where they start. This file contains that.
- Project2PCH1.h: ‘PCH’ stands for ‘precompiled header’. We’ll get to headers later, but basically this file is used as an optimisation for making your application compile faster.
- Unit1.cpp, .fmx, and .h: C++ splits its code units into two files, the main implementation file, where your methods etc are actually written, and a header, which is where they’re declared. A header basically tells the compiler ‘this is what you should expect to see’; the implementation .cpp is where you actually implement it. These two are logically paired in the mind of any C++ programmer, but C++Builder formalises it by calling them a ‘unit’. (If you go File > New > Unit you will get a new .cpp/.h pair.) In fact, in the code editor, C++Builder opens them as a single entity too, and you switch between the .cpp and header using tabs at the bottom of the code editor.
So what is the .fmx file? The new project created a new unit by default, but this unit is special: it is used for a form (a form is what becomes a window when you run the app.) A window has a UI design part too, and this UI is stored in the .fmx file. So for visual parts of your application, which are both code and UI, the unit has three parts: cpp, header, and form.
This app will become our calculator, and those default names are not very good. We could have saved the files with new names, but I wanted to explain what each one is first – project file, main file, precompiled header, form and unit. But let’s rename these.
In the project manager, right-click the bold Project2 node, and select Rename. Type in CppSuperCalculator. You’ll notice that the precompiled header and main file are renamed too – that’s because the IDE manages those and keeps them in sync. Then rename the unit – right-click it, Rename, and call it ‘uFormCalculator.cpp’. Notice that the unit has a + symbol next to it so you can see all three files that together form the unit – you can rename any one of these and the others will automatically rename to match.
Click Save All and check back in Explorer. The files will have been renamed.
You might see some other files – ‘*.local’, a ‘__history’ folder, etc – ignore these. The IDE uses them.
Building the project
Building is compiling – going from all the text source code to a final EXE file. You can build from either the Project menu, or by right-click the project and selecting Build. (Make is like a light build – it compiles only the bits that changed since last time. Clean wipes everything, all the intermediate saved files, so you start compiling from a clean slate next time.)
Do this, and you’ll see a window appear telling you it built successfully.
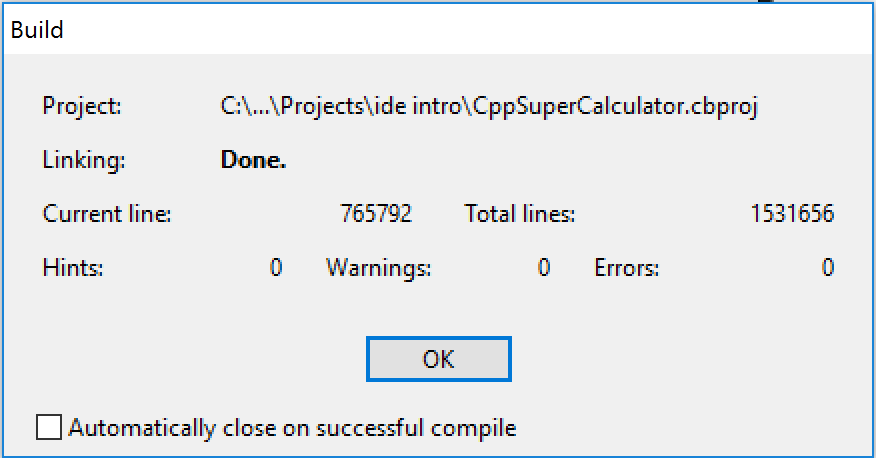
When you go back into Explorer, you’ll notice some new files and folders. There is now ‘CppSuperCalculator.res’ – this contains the program icon and version. There is also a Win32 folder, and inside that a Debug folder. These are where the temporary files are saved while building, and the final EXE is located. Win32 is the target platform (depending on what you installed, you have others, like Android too) and Debug is the build configuration – you can see this node in the Project Manager; there are two configurations by default, Debug and Release:
- Debug does less optimization and includes information helpful for the debugger to see what’s going on inside your program
- Release does more optimization and less debug info.
You use Debug while developing, and Release for the app you give your users.

Going by file extensions, the .#01 (and other number) files and the .pch file are to do with precompiled headers – something that doesn’t matter now. The .obj files are object files, which are compiled versions of each source code file or unit. The .map and .tds files are used by the debugger, and the .exe file is your final program!
Running and debugging
Don’t run this EXE (although you can) – let’s make the IDE run it.
Back in the IDE, there are two toolbar buttons, one a large green arrow and one the same green arrow but smaller, over a program.
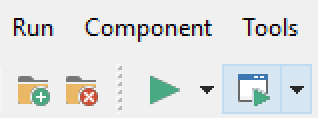
These are Run Without Debugging and Run (implied, this means Run With Debugging). They are in the Run menu too. Run Without Debugging just runs the program and doesn’t do any IDE / debugger magic; the most useful, and the one you’ll want to use every single time you run, is Run, which debugs as well. Go ahead and click it.
You will see the IDE change a couple of docked windows, and lots of messages appear in a window at the bottom. Then, you will see your application appear – a blank window, currently, but it’s your app!
Congratulations. Close the app by clicking its X button in its window, or in the IDE, click the red Program Reset button near the run buttons.
Debugging
Debugging is part of the art of programming, and is the process of figuring out why your app is not doing what you want it to be doing. When you’re doing that, the debugger is a very useful tool: it lets you examine the internal of your program to see what it’s actually doing, and step through code to see why it does particular things. You can change your program too: change the values of variables, call methods, right down to changing the values in processor registers if you really want to.
In order to demonstrate this, we’re going to add some more code to what is currently a very minimal project. Make sure the blank form is visible in the center of the IDE (if it isn’t, in the Project Manager double-click uFormCalculator, then in the center part, the code, editor, click the Design tab at the bottom. You will see the form designer appear: mostly white, with a grey blank form in the middle. This corresponds to the blank grey window when you ran the app.) In the bottom right part of the IDE, below the Project Manager, you will see the Tool Palette, and this contains lots of reusable components – visible controls, like buttons or checkboxes, and non-visual controls as well which perform other actions. (Make sure your app isn’t running; the IDE has different layouts when debugging vs coding.)
Expand the Standard item, and double-click TButton. A button will appear in the middle of our form. (Note you can drag and drop a control to the form too.)
![]()
Now, double-click on the button. This creates an event handler for when the button is clicked, that is, a method that is called when the button is clicked, and moves to the code editor. The method has been generated for you. Let’s add a line to show a message dialog – change it so it looks like this:
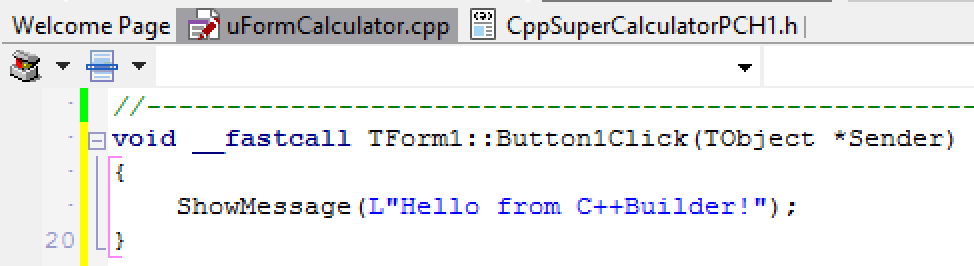
Note you need to get this exactly right. The L prefix to the string says it's a Unicode string (specifically, this is actually a string literal using wide characters, an array of wchar_t); the " marks have to be as they are on the keyboard, not Word-style quotes that change to point slightly towards the text they enclose; you need a semicolon at the end. If you make an error here, when you click run, you will get an error message in the Messages window at the bottom of the dialog.
Click Run, and your app will run. Now click the button, and you’ll see the message:

So far so good. Go back to the code editor, and notice that the ‘ShowMessage’ line has a blue dot next to it. That means the EXE contains code relating to that line.

Click the dot, and it will turn red and highlight the line. This is called a breakpoint, and means that whenever the application reaches that line of code, it will pause.

Click the button again, and this time instead of showing the message, the IDE will bring itself to the front. The red dot now has a blue arrow over it – that indicates the current line.
The program is now paused in the debugger. You can do several things – run it, so it continues; step line by line, so it executes the ShowMessage line but stops at the next, and so forth. Have a look at the other buttons on the toolbar next to the Run buttons, and also look in the View menu, Debug Windows, at all the things you can see.
Using the Best Compiler
So far we've gone with the default settings, but there's one very important setting you should change by default on all projects — and that is to turn on the modern compiler.
C++Builder uses a Clang-enhanced compiler for Windows 64-bit, iOS (32 and 64 bit), and Android. But on Win32 the default is to use the old, "classic" compiler, the one from the Borland days. Why? It's for existing users used to it. We'll change the default soon.
We strongly recommend you start with the new compiler and don't ever bother with the old, classic one. To do that, in a new project go to the Project menu, Options, C++ Compiler. Change the Target to 'All configurations – 32-bit Windows' and uncheck 'Use classic (Borland) compiler'. That is, this value should read False – we do not want to use classic.
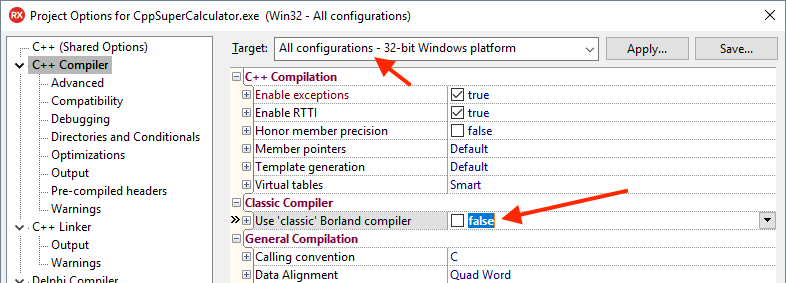
Settings are inherited, so changing this in the base Win32 configuration means it will apply in inherited Win32 targets, such as your Debug and Release builds. Check this by changing the Target combo to those targets and verifying the setting still has the same False value.
You should do this now, both so you know where the setting is, and so you've already done it by the time we start using modern C++ code in a later post.
This setting will be off by default in a future release.
Overall
That’s it for this post. We’ve created our first project, seen what a project contains, seen how the IDE manages some parts of it, run it, and debugged it. If you want to explore before next week, experiment with the debug windows, with the Step Over button on the toolbar near the Run buttons, with the breakpoint properties (if you right-click one), with the call stack window which shows the ‘stack’ of which method has called what to get you where you are now. Next week we’ll continue this app and start turning it into a real, useful calculator.
Read more
Next in the Learn to program C++ with C++Builder series:
- Part 1: Introduction and Installation
- Part 2: Building and Debugging
- Part 3: Design, Architecture, and UIs
- Part 4: Real Code and Useful C++: Ownership, smart pointers, styles, and optional values
- Part 5: Operators, and Final Application!