I might be starting a new series of blog posts, going back to classic tips. This one was triggered by a Quality Portal report, which refers to an imprecise (but not fully incorrect) page of the RAD Studio Doc Wiki — same works in C++Builder. I did a quick Google search and didn’t find a quick answer, but rather many incorrect and old ones. So here it goes.
The Windows ListBox control (one of the primitive and classic user.dll controls) generally displays a single list of strings. They can have associated data, but that’s a separate topic. Since early versions of Windows, the operating system offers some special configurations to allow multi-column list boxes. These are made available using specific styles when creating the control, and specific Windows messages (like LB_SETCOLUMNWIDTH and LB_SETTABSTOP) to pass data. The good news is that the VCL TListBox control wraps these features making them easy to use. The bad news is documentation is not that precise and even long time Delphi developers might not know how to achieve this.
The first option is building a list box with content flowing on multiple columns. The list box still have a list of strings, once at the end of the available space, rather than scrolling vertically the data is added to a new colum and possibly scrolled horizontally if it doesn’t fit. For this, you use the Columns property and the VCL will make the width of each colum equal to the width of the control divided by the number of columns. This is a sample code snippet:
  ListBox1.Columns := 3;
  for var I := 0 to 30 do
    ListBox1.Items.Add('hi');
If you press the button once (with the control size in the first image below) it fills the first two columns and part of the third. By pressing the button again, you get more content with a horizontal scrollbar (second image).
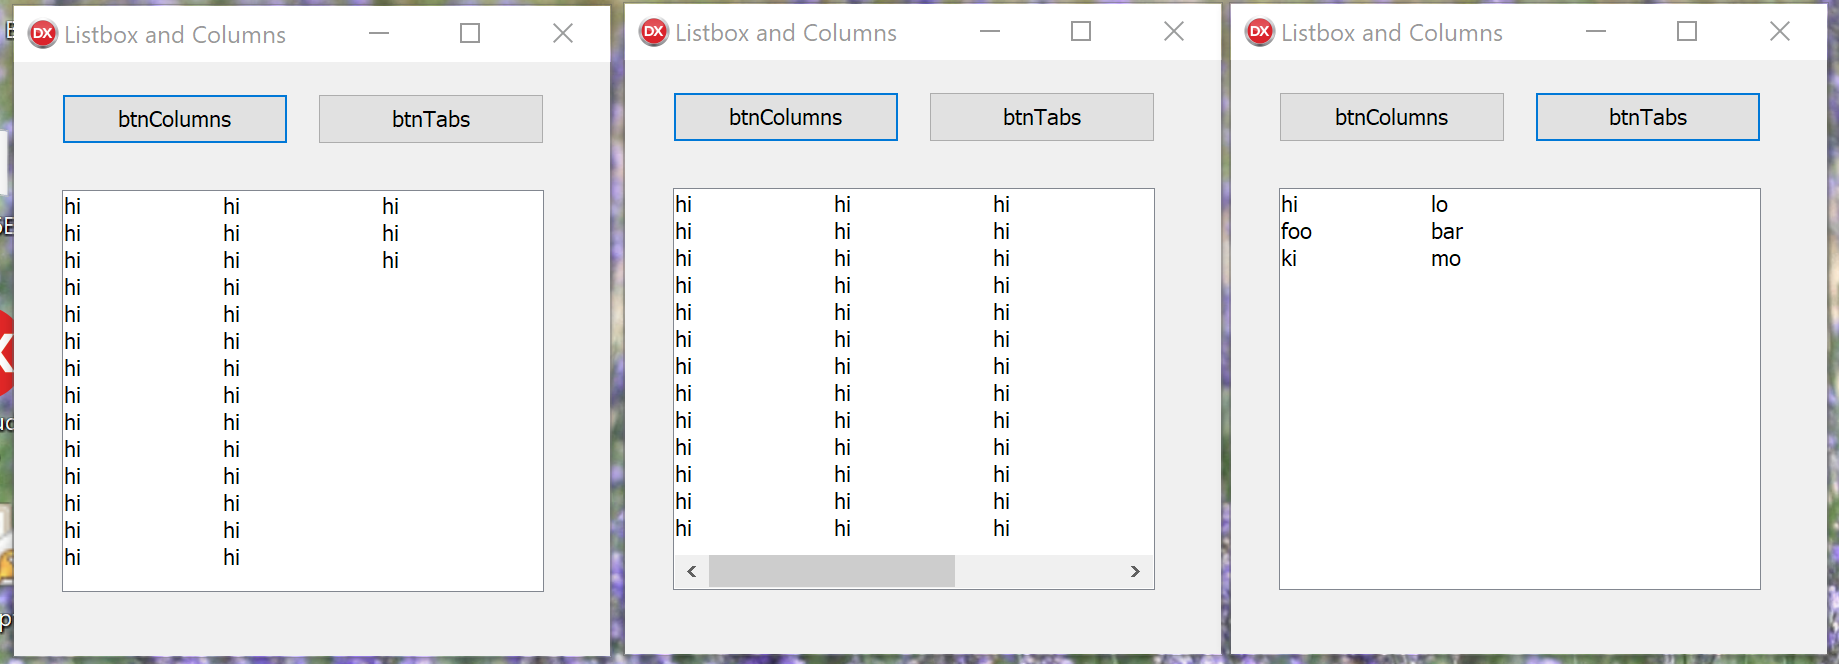
Another completely different approach, is to set the TabWidth property to obtain a list box in which individual lines can be displayed in columns, as long as they use tabs in their text. This is displayed in the third image above, and can be obtained with code like the following (notice #9 is the tab character):
  ListBox1.TabWidth := 50;
  ListBox1.Items.Add('hi' + #9 + 'lo');
  ListBox1.Items.Add('foo' + #9 + 'bar');
  ListBox1.Items.Add('ki' + #9 + 'mo');
Now you might wonder why this isn’t used more, and the reason is if the text doesn’t fit the tab, the formatting becomes totally inconsistent — unlike a ListView with report configuration or a grid. Still, having a set of strings you could compute the display width of each of them with the given font, and set the tab width accordingly…
That’s all for this small classic tip. Let me know if you find it interesting, I can come up with many more 😉