RAD Studio 10.4 Patch 1
We have a patch (what used to be called a hotfix) available for RAD Studio. The patch addresses a number of items:
Missing files:
- synth.py: this is required for the new C++ Win64 LLDB debugger to function correctly. Without it, you can debug, but you need this file to get the new formatters and visualisation for STL and other types
- DUnit/Linux64 files
- System.Contnrs for Mobile
- FMX.DAE.Scheme.* units
- Indy .inc files
Plus:
- Changes to defaults.xml and CodeGear.Deployment.Targets build files
Read on for how to install – things are different and better in 10.4!
Installing Patches in 10.4
In the past, to install a patch like the one above you would have downloaded a file and manually unzipped it and copies files to your RAD Studio installation folder. This was not ideal, due to it requiring manual installation (there’s always room for error), plus there was no in-IDE list of what had been installed.
In RAD Studio 10.4, we have a new patch installation method. Patches are now installed by GetIt. When a patch is available, you will see a notification in the Welcome screen:
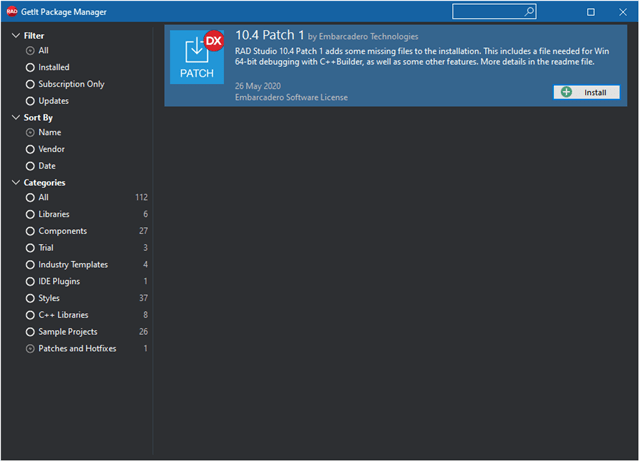
If you have no patches, this text will tell you that your IDE is up to date. In this screenshot, a patch is available. Here, my mouse is over the patch notification, so it’s highlighted. Clicking it will open GetIt to a new Patches and Hotfixes section:
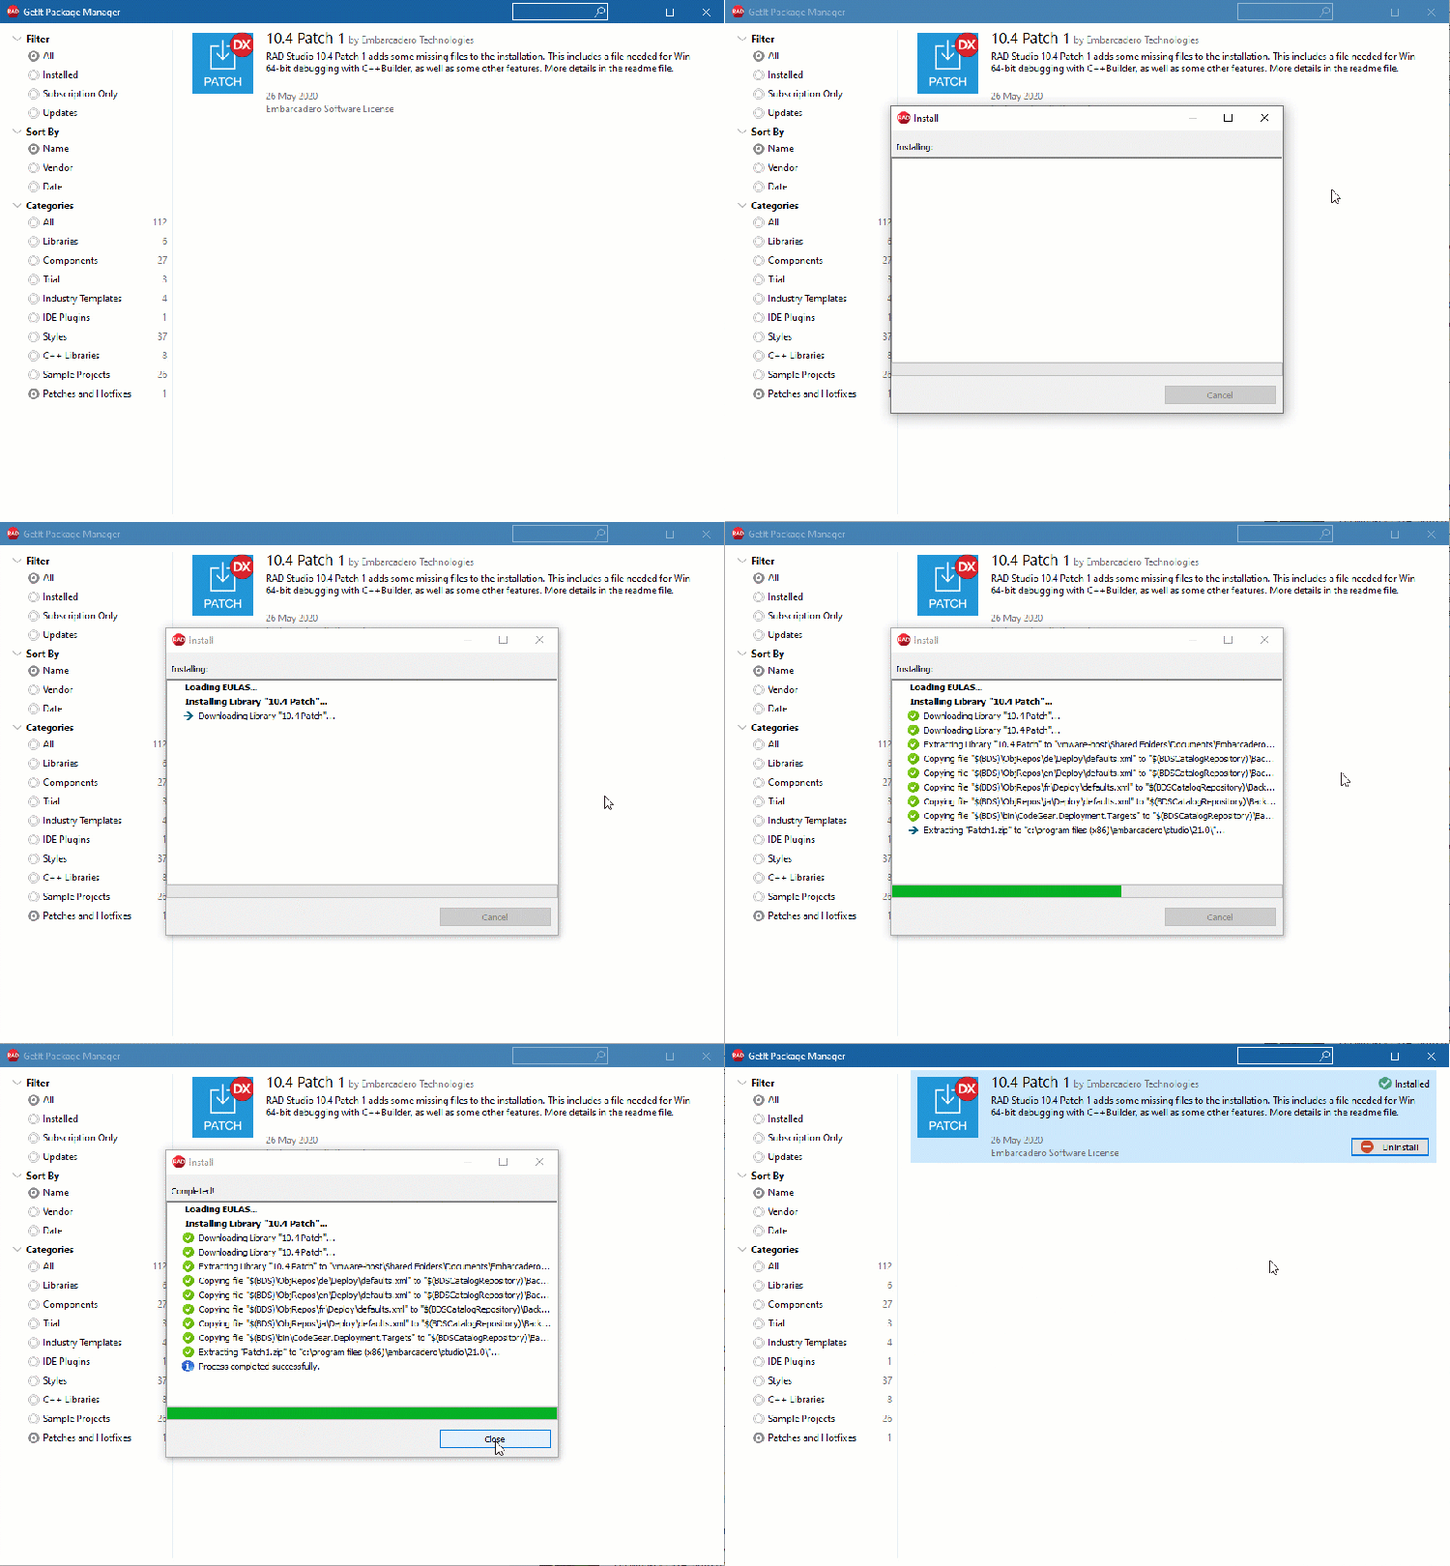
Click the Install button to install it.
Patch 1 installs right away. In future, it is possible some patches will apply to files that are in-use while the IDE is running. GetIt will handle those fine, by closing the IDE and installing.
Patches will only appear in the Welcome screen if the IDE can connect to the GetIt server. 10.4 uses the same GetIt-based installer for both online and offline (ISO) installations. If you installed from ISO, which is offline mode, you’ll need to tell GetIt to look online for data rather than using the ISO image as its installation source. You can do this by running the following at a command line:
GetItCmd.exe -c=useonline
(Similarly, use -c=useoffline to go back offline.)
Installation instructions for Patch 1
The installation instructions for Patch 1 are therefore very simple:
- Close all projects, or open the IDE if it’s not open
- Look for the patch notification on the Welcome page. Click it. Select the patch in the GetIt window and click Install.
- Keep an eye out for any Windows UAC notifications in the taskbar, asking for permission to elevate GetIt. Sometimes they appear behind the IDE. Click the taskbar button for it if it doesn’t appear on top of the IDE
- After installation, the Welcome screen may not update (it doesn’t ping servers often and so doesn’t refresh after GetIt runs), but you should see an “up to date” message next time you open the IDE
If you installed via the offline ISO installer:
- Run GetItCmd.exe -c=useonline and then follow the instructions above
- Alternatively, the patch is available for download and installation the old-fashioned manual way here. We recommend installing via GetIt since it handles installation for you, and you can see which patches are installed by opening GetIt.


