As you can read in the comments of the blog post announcing Berlin 10.1 Update 1, if you are using the GetIt based installer, the registry settings are not preserved as you uninstall, unlike when you are using the traditional ISO-based installer.
Beside manually backing up and restoring part of your registry configuration, a solution you can use is to leverage the
Migration Tool
application that comes with RAD Studio to move your settings from RAD Studio 10.1 Berlin to Update 1. All it does is, in fact, backup and restore part of your registry!
Here is a short visual guide to the process.
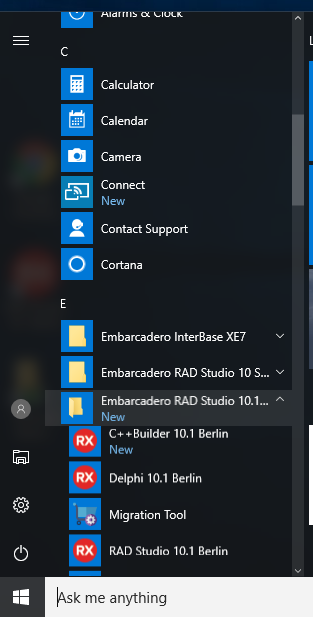
1. Before you install Update 1, find and run the Migration Tool app, that is linked in the Windows Start menu, in the Embarcadero RAD Studio 10.1 group. This is where I see it in Windows 10:
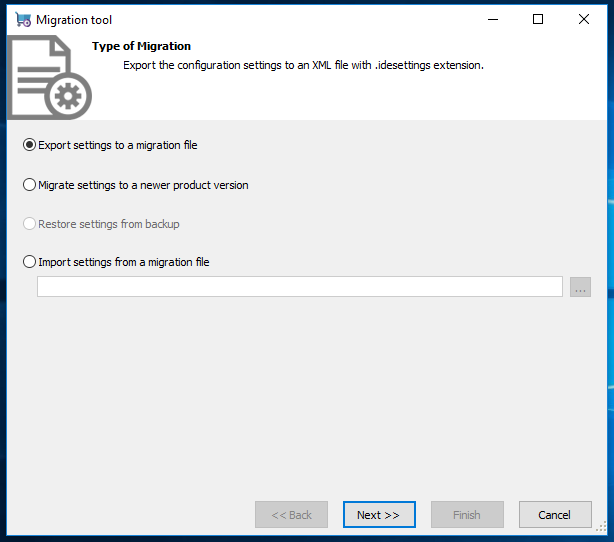
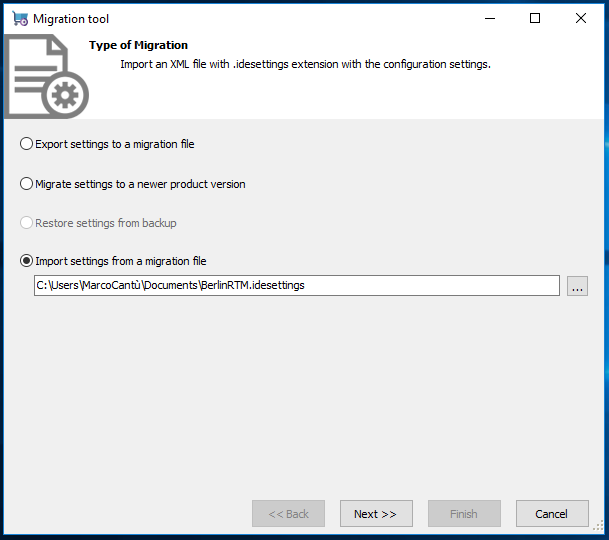
2. As you run the Migration Tool, pick the option for exporting your settings:
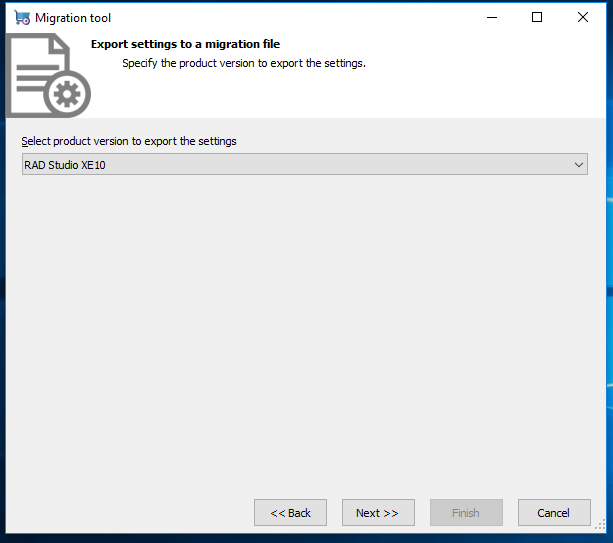
3. Now choose the product version you want to backup. It should list different versions of RAD Studio you have on the machine. For 10.1 Berlin you have to pick the entry with "XE10", as this was wrongly listed in the original version of the tool.
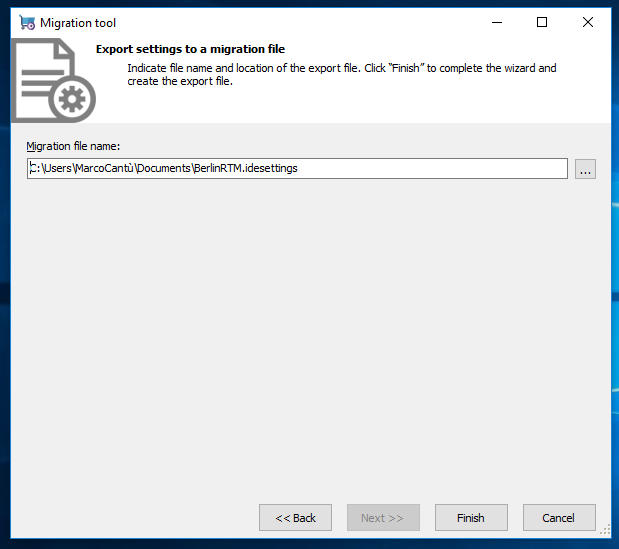
4. Choose an file as a target, it will be an XML file but better go with the default extension. In the next screen keep all options selected (for the various areas of the configuration) and proceed.
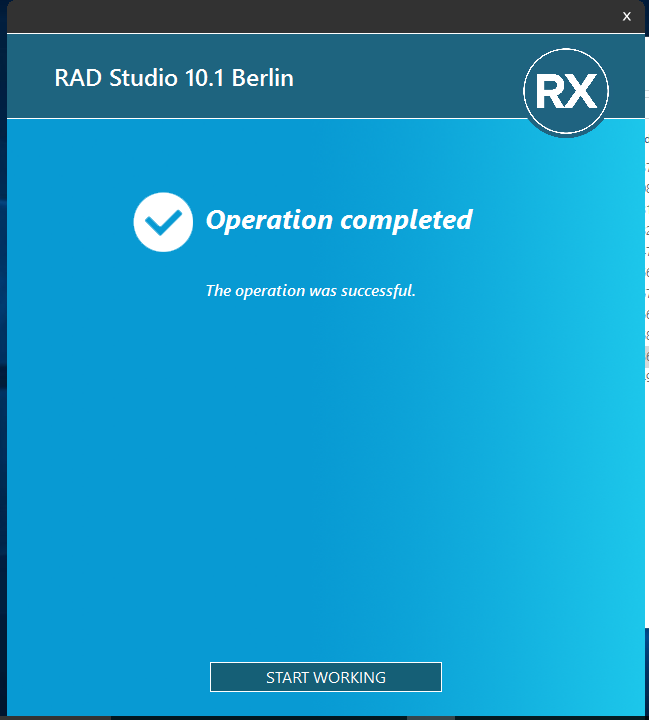
5. Now install Update 1, which will trigger an uninstall. After the installation is over, run the product once (as this creates the proper default registry settings).
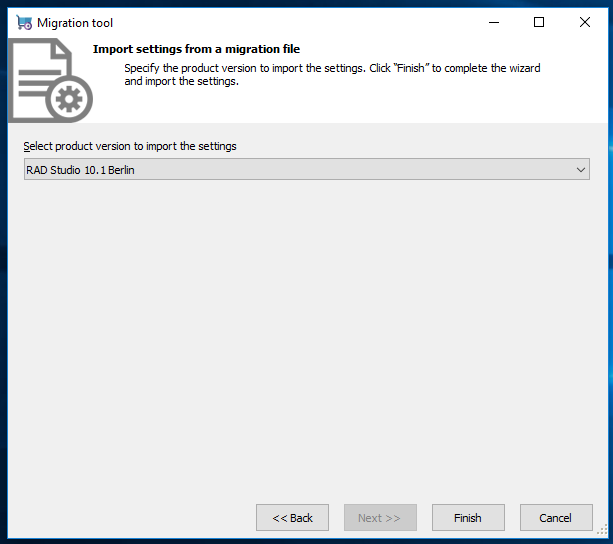
6. Now close the RAD Studio IDE, run the Migration Tools again, and this time pick the option to import the settings. Select the same file you saved earlier:
7. Now select the version these settings are for. After installation of Update 1, the Migration Tools will correctly list "10.1 Berlin" as the version so you shoudl pick that:
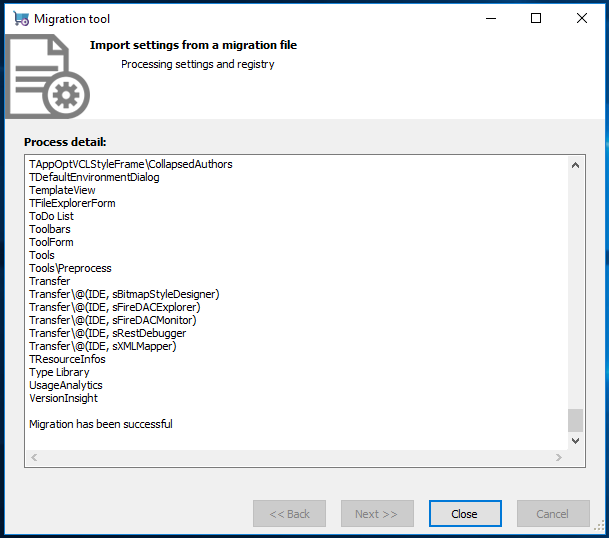
8. Select again all options (unless there is anything you want to retain from the new configuration), run the tool, and it should re-apply all of your settings.
9. Run the IDE again, and you should see custom configurations, additional packages, and everything else you had in the product — and that is registry-based.
I hope this helps reducing the burden of installing this update, and again fully recommend making a copy of the registry entries before you start installing, either manually or even better with this tool.
PS. As for why an update requires an re-installing, it would be the good topic for another blog post. In short a list of patched files will be huge (see as an example how we shipped 1 GB for a hot fix of 20 issues at http://cc.embarcadero.com/item/30476). Also making sure you get the right bits depending on your version, and that any file you modified won't be overridden, and considering if you installed a given hot fix already or not — which changes the original size of the file to replace — would make a fix extremely complex to handle and very likely to leave with a not working system.
As a reminder, for those suggesting you can do it better with your software, the Studio/18.0 folder alone under Program Files includes over 50,000 files for a full Enterprise install. And that doesn't include demos, platform libraries, and many other files that are installed in other locations. Just saying…
![]()